How to Add Google Authentication in Node Application
This article explains how to add Google authentication such as login function in the Node.js application.
1. Set up a project
First thing first, let’s create a project directory and install packages.
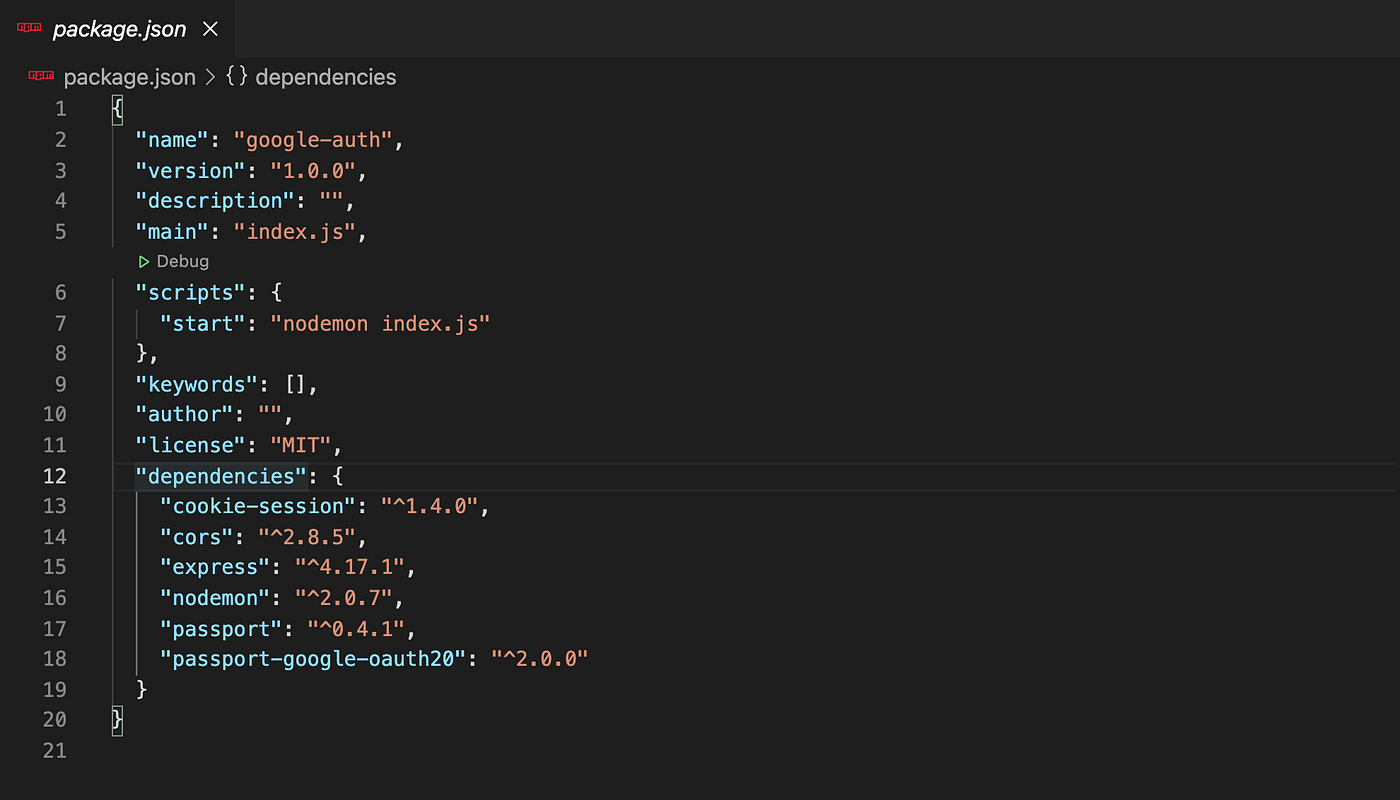
- Create a project directory, then type
npm init -yto create apackage.jsonfile in your terminal. - Create
index.jsandpassport-setup.js. - Install libraries. You can copy and paste this command.
npm i express cors nodemon cookie-session passport passport-google-oauth20. - Go to
package.jsonand make sure that you successfully installed these libraries, then change your"scripts"to"start" : "nodemon index.js".
2. Create a base for Index.js
Next, create basic routes in index.js.
- Import libraries,
express,cors,passport,cookie-session. - Define
const app = express(). - To allow all APIs to be CORS-allowed, write
app.use(cors()). - To parse the application, URL encoded, JSON, write
app.use(express.urlencoded({extended:false})app.use(express.json(). - Create a top route. You may send some random text to test, something like
app.get("/", (req, res) => res.send("Hello World")). - To bind and listen the connections on the specified host and port, write
app.listen(3000, ()=> console.log(`Example app listening on port ${3000}!`). - Now you can try
npm startthen you’ll see “Example app listening on port ${3000}!” if it’s working correctly. Also, you can accesslocalhost:3000and you’ll see “Hello World”!

3. Create a base for passport-setup.js
Next, create basic functions in passport-setup.js.
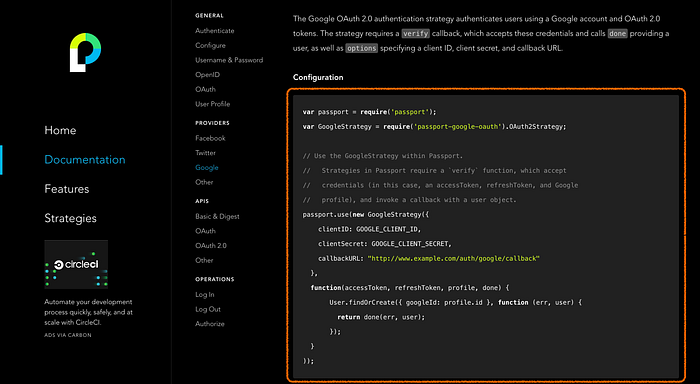
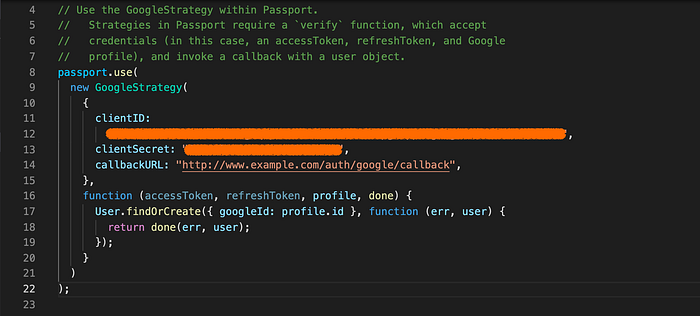
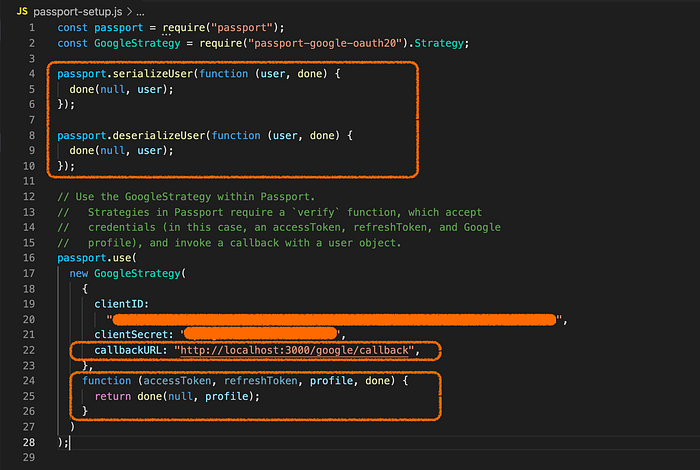
- Go to Passport documentation. Copy configuration and paste it into your file. You may change
vartoconst. - Since we installed
passport-google-oauth20, change second line toconst GoogleStrategy = require("passport-google-oauth20").Strategy.
4. Create a Credential key on GCP
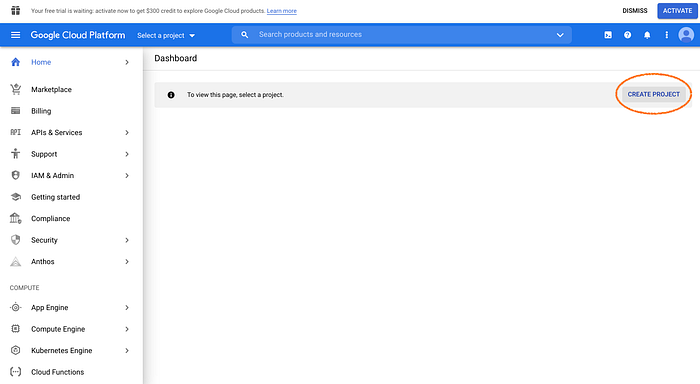
Next, create a credential key on the Google Cloud Platform. You might need to create a project.
- After login with Google Account, click “CREATE PROJECT”.
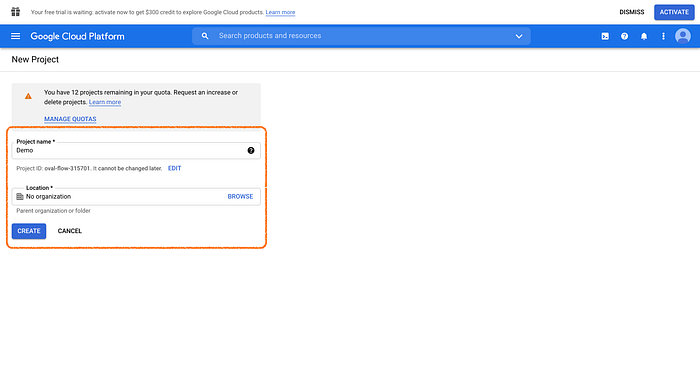
- Name “Project name” and choose “Location” if you have, then click “CREATE”.
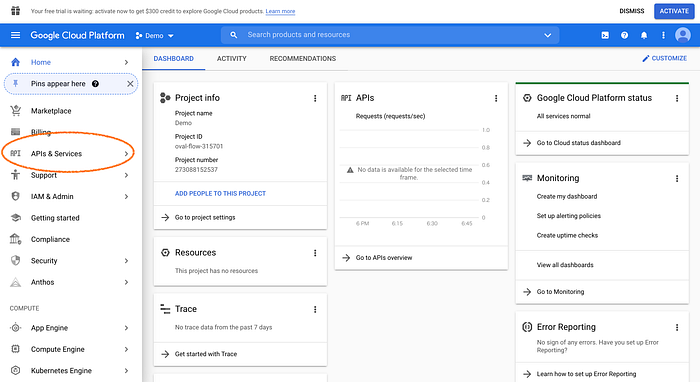
- Click “API & Services”.
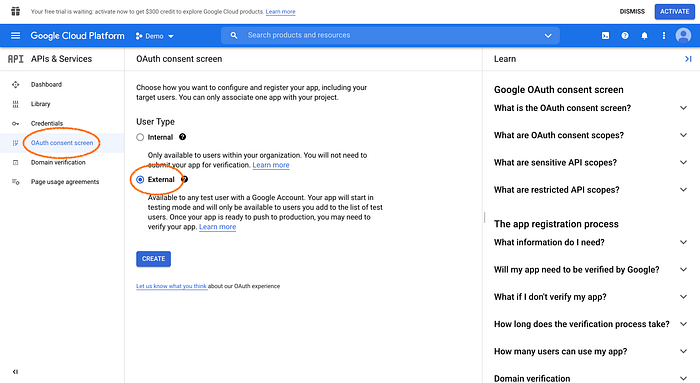
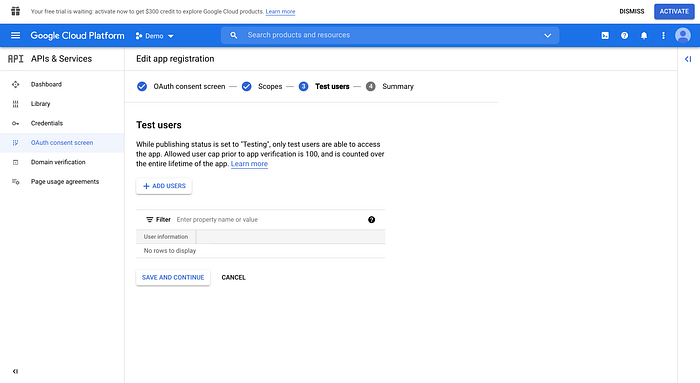
- Click “OAuth consent screen”, and choose “External” as user type, then click “CREATE”.
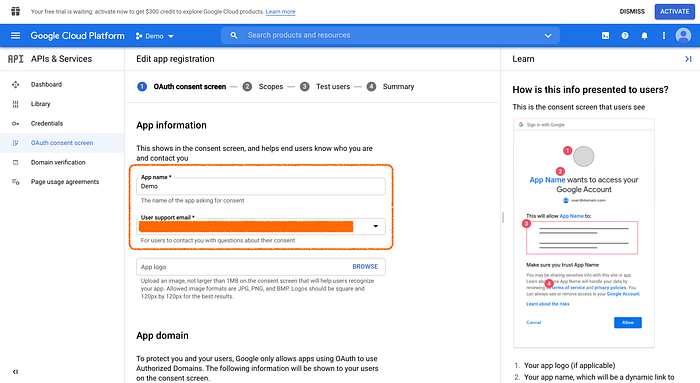
- Input your “App name”, “User support email”, and “Developer contact information” down below, then click “SAVE AND CONTINUE”.
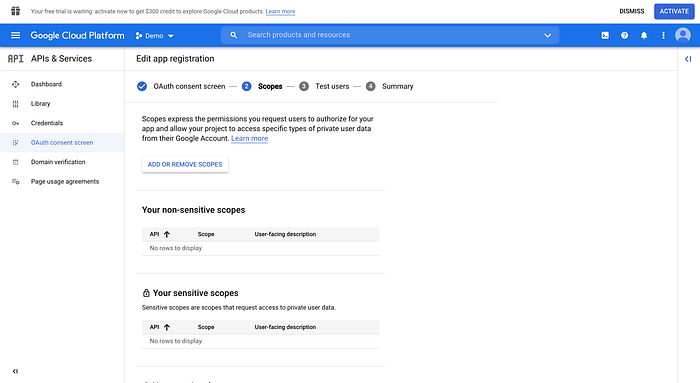
- About scopes — Just click “SAVE AND CONTINUE”.
- About test users — Just click “SAVE AND CONTINUE”.
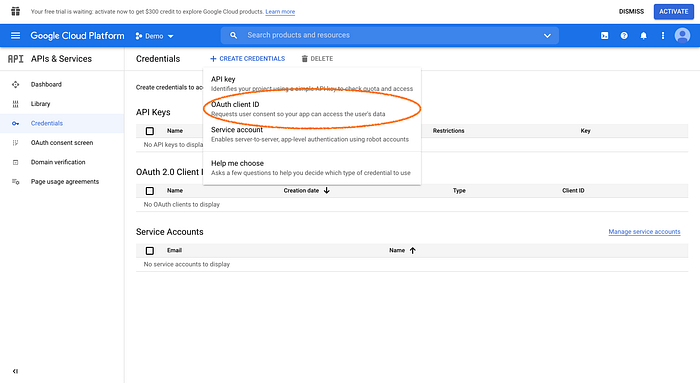
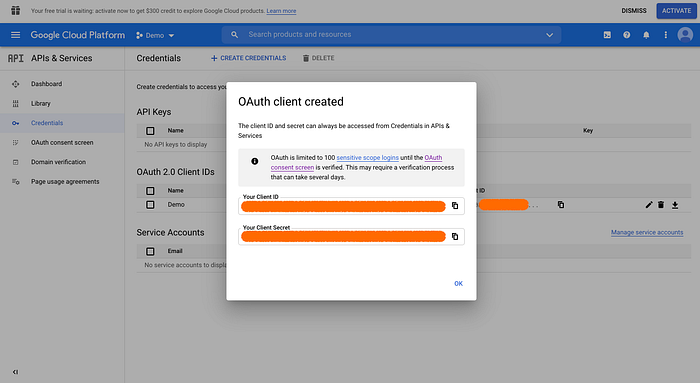
- After you see the summary, you can click “CREATE CREDENTIALS”, then click “OAuth client ID”.
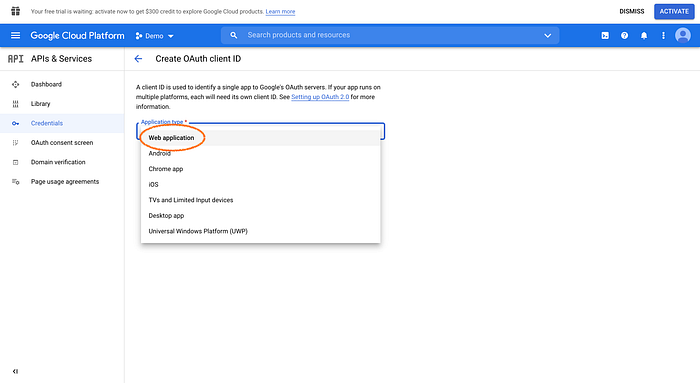
- Choose “Web application”.
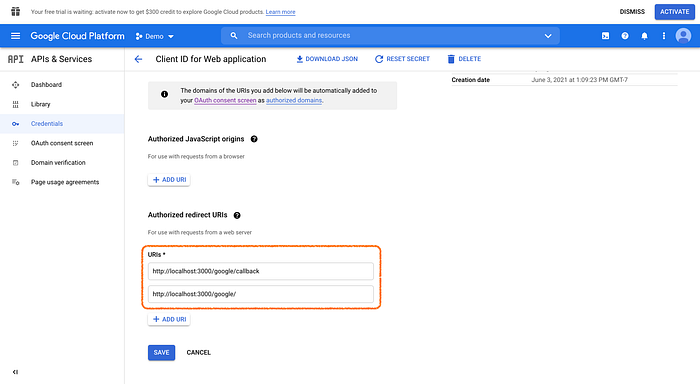
- Name app name whatever you like, then add “URIs” for “Authorized redirect URIs” down below. You can input
http://localhost:3000/google/andhttp://localhost:3000/google/callback. - You’ll see your ID and Key.
- You need to copy and paste them on your
passport-setup.jsfile.
5. Implement index.js
Next, let’s implement routes and functions in index.js.
- To use passport from
passport-setup.js, writerequire("./passport-setup"). - Go to Passport documentation. Copy roures and paste it into your file. Plese make sure to paste before
app.listen(). - Since we set up route as
http://localhost:3000/google/andhttp://localhost:3000/google/callbackon GCP (4–10), change routes from/auth/googleto just/google, and from/auth/google/callbackto/google/callback. - For the first authenticate mehod, change scope
scope: ["https://..."]to["profile", "email"]. - For the second authenticate mehod, change
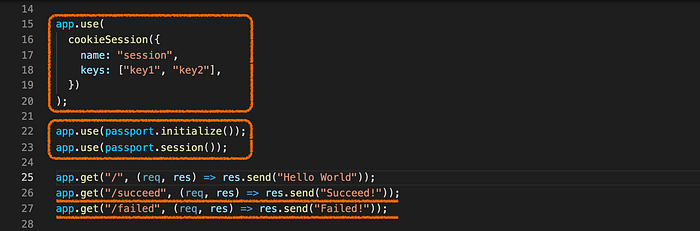
failureRedirect: "/login"tofailureRedirect: "/failed", andres.redirect("/succeed"). - Create
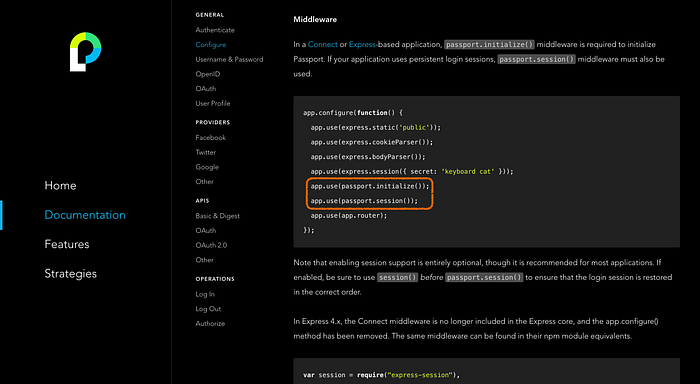
"/failed"and"/succeed"routes. - Go to Passport documentation. To initializes passport and passport sessions, copy two lines in middleware and paste it into your file.
- Go to Cookie-Session package page. Copy
app.use()and paste it into your file. For an actual app you should configure this with an experation time, better keys, proxy and secure.


6. Implement index.js
Next, let’s implement functions in passport-setup.js. Since we don’t use db for this, I’ll code this demo app as simple as possible. So that some functions might not work for the real full-stack app. In that case, please read docs carefully.
- Change
callbackURL: "http://www.example.com..."tocallbackURL: "http://localhost:3000/google/callback"inpassport.use(). - Also, change inside function, just
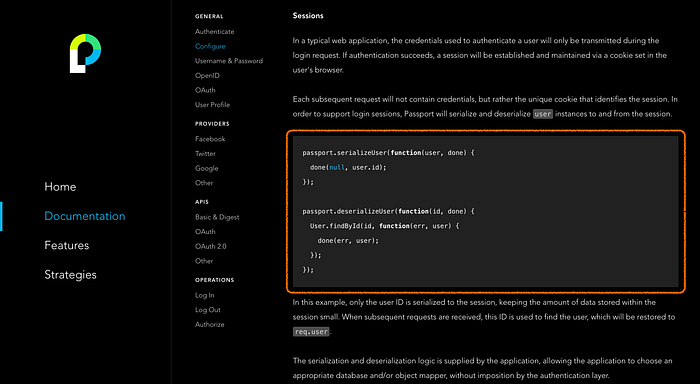
return done(null, profile). - Go to Passport documentation. Copy sessions and paste it into your file.
- Change inside
passport.serializeUser(),user.idtouser. - Change
passport.deserializeUser(),functionser(user, done)tofunctionser(id, done). Inside function, delete them all and just writedone(null, user).
7. Done!
Let’s test it out! Go to http://localhost:3000/google and try Google login. Hope you can see “Succeed!”.